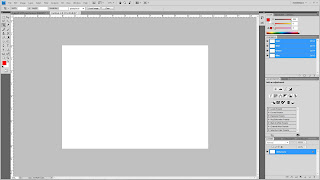
development from exercise 1
Watsup!!! This blog is intended to show my progress in using Adobe Flash and Photoshop for my Computer Graphics Class in Mulitimedia University (in malaysia). Feel free to comment, because i believe your criticism can make me learn more and improve my skills.Thanx a bunch!
Total Pageviews
Friday, December 24, 2010
Wednesday, November 17, 2010
Exercise 1
This is the part of photoshop that i've been longing to learn so i really hope i pulled off something atleast.
This was the original picture,and please observe that i do look good already hehehe!
Then i had some white spots on my face(I can't believe i just said that)...but anyway i used the spot healing brush to take care of those Yeah!!!
I then used the Clone stamp tool to remove those massive eyes bags below my eyes and also clear some of the yellow in my eyes
I then used the dodge tool to brighten up my eyes a little.

This was the original picture,and please observe that i do look good already hehehe!
I place the image into photoshop and had to scale it down into a 640 x 480 resolution document
I first used a curves adjustment to brighten up the image: Image>Curves
Then i had some white spots on my face(I can't believe i just said that)...but anyway i used the spot healing brush to take care of those Yeah!!!
I then used the dodge tool to brighten up my eyes a little.
Lastly using the quick selection tool to select the red parts of my shirt,i then applied a hue and Saturation adjustment to change the colur of the shirt.
I went ahead to add to change the background of the image because it looked kinda dull, i extracted myself from the background using the quick selection tool.
then on a new layer i added a gradient and used a brush pack called winter breeze to add the brush strokes onto the background.
And so this how i look:
BEFORE

AND
AFTER
Tuesday, November 16, 2010
Assingment 1:BRAZILIAN CARNIVAL(part 2)
STEP 1: Open a new document
Open a new photoshop document.I'll be using an A4 sized canvas
Go to Image>Image Rotation>90CW
adding a stroke with these settings:
A view of the text
I also added the text 4day festival, just to inform you how long this festival takes:
And with the text added i'm done and so Behold my Brazilian Carnaval festival Wallpaper!!!!
Open a new photoshop document.I'll be using an A4 sized canvas
Go to Image>Image Rotation>90CW
Press D on the keyboard to reset the background and foreground colours to black an white.then hit Alt+Backspace to fill the layer with black
STEP 2:Place images in the document and edit them.
Drag all the images into to the working document.
Turn off the visibility of all the layers apart from the dancer layer and the city layer . and use free transform(Ctrl+T) to rescale the image of the the images to the suitable size
With the city layer selected got to Image>Adjustments>curves and i used the following settings:
Now the image looks like this:
Add a layer mask to the pefromer layer and using a hard brush,brush over the shoes of the dancer to reveal parts of the city.this creates an effect of the dancer standing in the city
Add a layer mask to the city layer and use a soft brush set to black and hid parts of the image.
Turn on the confetti layer and place it directly underneath the dancer,resize the image.
add a layer mask to it and mask off parts of the image.
Next turn the visibility of the fireworks,and change the blending mode to screen.add a layer mask to the layer and mask of the edges to make it blend in more.
After that i duplicated the fireworks layer (Ctrl+J) a bit more times and used the Image>Adjustments>Hue and Saturation as well as the free transform on respective layers to give the fireworks different depth and colour.
Next i used the Burn tool with settings of Shadows and 50% exposure to darken the lower regions of the wall paper and aswell as a dodge tool with settings of Highlights and 50% exposure to brighten the upper parts of the wall paper.
STEP 3:Create the text.
pressing 'T' on the key board and using the text tool creates a new text layer in which you are able to create text. I'll be using a font called Samba!
I typed out "BRAZIL CARNAVAL" in a yellow colour and added a few layer effects to the text by doubling clicking on the text layer and adding a purple glow and a green stroke.I also rotated the text using free transform
Adding an outer glow with these settings:
adding a stroke with these settings:
A view of the text
I also added the text 4day festival, just to inform you how long this festival takes:
*I decided to scale the image of the dancer up a bit,it look better to me*
And with the text added i'm done and so Behold my Brazilian Carnaval festival Wallpaper!!!!
END
(I really hope i did Brazil proud!!!)
Monday, November 1, 2010
Assingment 1: BRAZILIAN CARNIVAL(part 1)
So i'm doing the Brazilian Carnaval...my idea is to make the my wall paper reflect the joy and celebration together with the vibrancy that this carnival brings to the cities in brazil...i have chosen the following pictures to use in my wallpaper.All the pictures were got from this link Flickr.I thank the owners of these respective images for making them available.
Now to work!!!
Step 1:Preparing the photos
i used the pen tool to draw a path round part of her body
Use the quick selection tool to a parts of the upper body to the selection
THE CITY
Now to work!!!
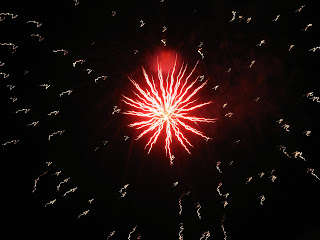 |
| Fireworks |
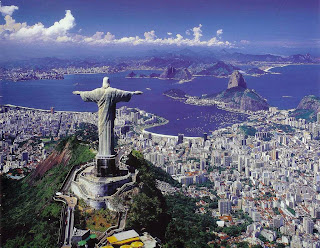 |
| an arial view of Rio de janeiro in Brazil |
 |
| Confetti |
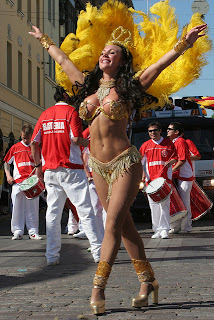 |
| A beautiful samba performer |
Step 1:Preparing the photos
There were parts of the image in some of my photos that i didn't need so using photoshop i deleted the parts i didn't need
THE PERFORMER
First to extract the performer from her background
right click>makeselection to make the path a selection
rightclick>Layer via copy copies the selection onto a new layer
in the channels palette solo the blue layer and using Image>Calculations make an alpha channel of the blue channel.
Then using a levels adjustment ,adjust the levels of the Alpha channel until the black of the perfomer stands out of the white background.
Carefully brush the performewr completely black using a hard brush.
Then selct the black area of the image using the quick selection tool.
Use Ctrl+I to invert the selection and then use Alt+backspace with white as your foreground coluor to fill the rest of the image white.
Deselect by pressing Ctrl+D.
Then invert the image colurs by pressing Ctrl+I.
Reactivate the RGB channel by selecting it.
Go to Select>Load Selection and choose the alpha channel
A selection of our performer now appears on the perfomer layer.
Invert the selection and delete the remaining parts of the background
THE FIREWORKS
I won't do anything to the fireworks image.
I just prepared the document so that it's easier to get later
THE CONFETTI
The confetti image in a new photoshop document
Duplicate the background layer Ctrl+J and name the new layer Confetti.
Turn the Visiblty of the background layer off.
Go to Select>Colour range to select the colour of the sky
Click okay to make the confetti a selection
Invert the selection and delete the sky.
Deselect.
THE CITY
Open the image of Rio de janeiro in a new photoshop document
Subscribe to:
Comments (Atom)


