
STEP 1: Rotating the image:
Select the crop tool (shortcut 'C') and drag a transformation and is align it to the required part of the image.

Pressing enter,confirms the selection and rotates the image.

Create a duplicate layer of the background layer (Ctrl+J) and name it 'Image'.

STEP 2: Adjusting the colour and exposure
The image has a high amount of red in it.With the image layer selected go to Image>Adjustments>Curves
In the Curves Settings box go to channel select Red.

 |
| Adjust your red channel settings to bring down the amount of red in the image. |
the image now looks like this:

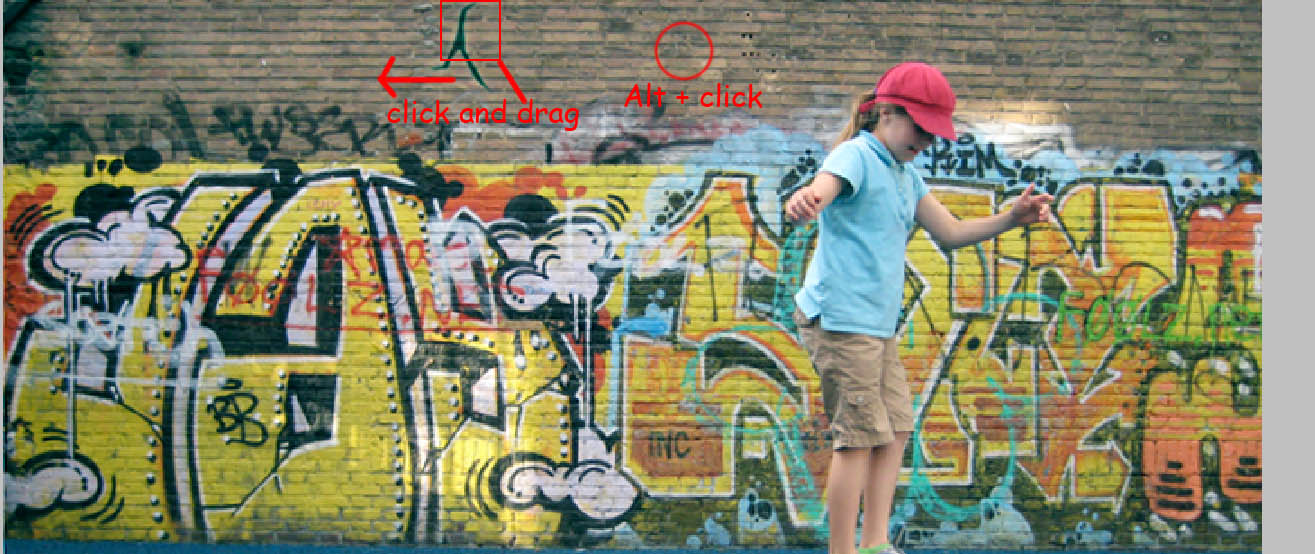
STEP 3: Using the clone stamp and spot healing tool.

There are some white spots on the ground that can be removed using the spot healing brush tool
 |
| white spots on the ground |
By selecting the spot healing brush tool of a small size go over the white spots and click once to heal the areas.

Now we'll clear up parts of the wall by using the clone stamp tool.
Alt+click on a clear part of the wall and then click on parts you want to retouch and drag over them.
 |
| NOTE: you may have to change your sample area. |
the image looks like this now:

STEP 4:Changing the colour of the girls hat and shirt.
Using the pen tool,draw a path around the girls hat.

Right click on the path using the pen tool and click on make selection.
 |
| right click to make the path a selection |
 |
| Enter your required settings |
 |
| the selection is now made |
Go to Image>Adjustments>Replace colour.
The eye dropper with a plus sign adds sampled colours to the affected regions


Now using the quick selection tool make a selection of the girls
shirt.
holding 'alt' enables you to delete parts of a current selection

click the tint check box and add a tint to the shirt.

STEP 5: Saturating the wall
Using the the Sponge tool with it's mode set to Saturate and flow to 50%

gently saturate parts of the wall by clicking over the wall.

STEP 6:Final touches
Duplicate the Image layer and name it 'Top' add a gaussian blur to that layer(Filter>Blur>Gaussian blur) with settings of 1.7 pixels.

Change the layer's blending mode to "soft light".

Now add an Unsharpen filter by going to Filter>Sharpen>Unsharpen Mask and use the following settings:

The unsharpen mask sharpens the image again.

BEFORE
AFTER

No comments:
Post a Comment