I usually see some photo manipulations done on net, so i thought to myself, why not try that out?...and so i did...usually in photomanipulations a bunch of photos are brought together in photoshop in order to make one image.
i got some to pictures off flickr to use in my project.
 |
| cracks in dry mud |
 |
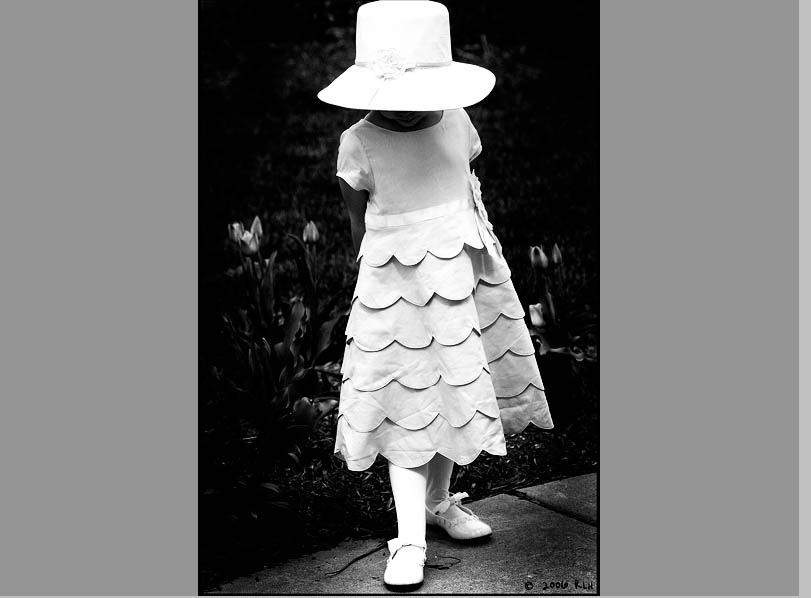
| little girl |
 |
| a drawing of some kind of demon |
so let's get started:
 |
| texture of a wall |
Open a new photoshop document with these properties;
 |
| change he name of the document as well,i called mine "Manipulation" |

Open up your channels palette,by going to window>channels.

the channels palette lets you create and manage channels and monitor the effects of editing.we are looking for the colour channel that has the most contrast between the little girl and the background.
|
| (to view a channel alone click on it's layer to activate it) |

RED CHANNEL

GREEN CHANNEL

BLUE CHANNEL
As you can see the red channel and green channel do have a contrast between the background and little girl but the problem is some areas of the background appear to almost as bright as the little girl and this could be a problem when we start to use the level adjustment on the channel.
So choose the blue.with the blue channel selected go to Image>Calculations and enter the following properties:

 |
| make sure to select the little girl layer and the blue channel for both sources |
This will create a new alpha layer from the blue channel named "Alpha 1",setting the blend mode between the two sources in the calculations dialog box increases the contrast even more.
 |
| Alpha 1 channel |
Now with the Alpha channel selected open up the levels adjustment by pressing Ctrl+L on your keyboard or by going to Image>Adjustments and selecting Levels.

now the idea is to make everything that's not the girl black and the girl white
Using the adjustment layer adjust the input levels for the shadows,midtones and highlights to get as close as possible to achieving what we want.
i used these settings and achieved this:

 |
| the contrast between black and white has been increased even further |
Now using a hard brush paint the inside of the girl white and the the remaining parts of the background.

Using Ctrl+I on the keyboard will invert the colours of the image.incase there are some parts of the image that need to be touched up with the brush tool,do so.

Press Ctrl+I to invert the image again.
Select the RGB channel to activate the original image.
then going to Select>Load Selection and choosing the Alpha 1 channel as a selection.


*make sure to right click on the little girl layer and select rasterize layer*
With any selection tool right click on the image and select layer via copy to cut out the selection and name it Girl.

 |
| the cut out selection. |
STEP 3: ADD THE BACKGROUND
*shut off the visibility of the Little girl and Girl layer*
Unlock the Background layer and turn it's visibilty back on,now apply a radial gradient to the layer.

i used these colours to make my background together with these settings in the gradient settings box


now place the wall texture into the document and transform using the Free transform tool(Ctrl+T),to fit the background.

*REMEMBER TO RASTERIZE ALL IMAGES YOU PLACE INTO PHOTOSHOP*
Now place the mud cracks into the document and we'll align it to the wall to form a floor.
Using the free transform tool by holding ctrl while dragging the corners of the transformation box enables us to
create a perspective effect on the mud cracks.

Using the Move tool,while holding 'alt' and drag to create more two more instances of the mud cracks.


add a layer mask to the top two mud crack images and use the brush tool on the the mask to adjust floor in order to make the floor look much more natural.


 |
| Floor looks more natural now |

Now duplicate the Girl layer by pressing Ctrl+J on the keyboard,name the new layer shadow and move it below the Girl layer.

Double click on the shadow layer to bring up the Layer styles dialog box,select the colour overlay option and use these settings.

Adjust the shadow image using the free transform tool in order to create a short shadow of the girl falling on her right hand side

Now change the blending modes for the wall and floor group layers to Overlay.

 |
| clicking this adds a curves adjustment layer above the Girl layer |
Right click on the curves layer and select create clipping mask,this make make sure that all curve adjustments only affect the Girl layer(layer directly below it).
 |
| adjust the RGB curve until you're satisfied |
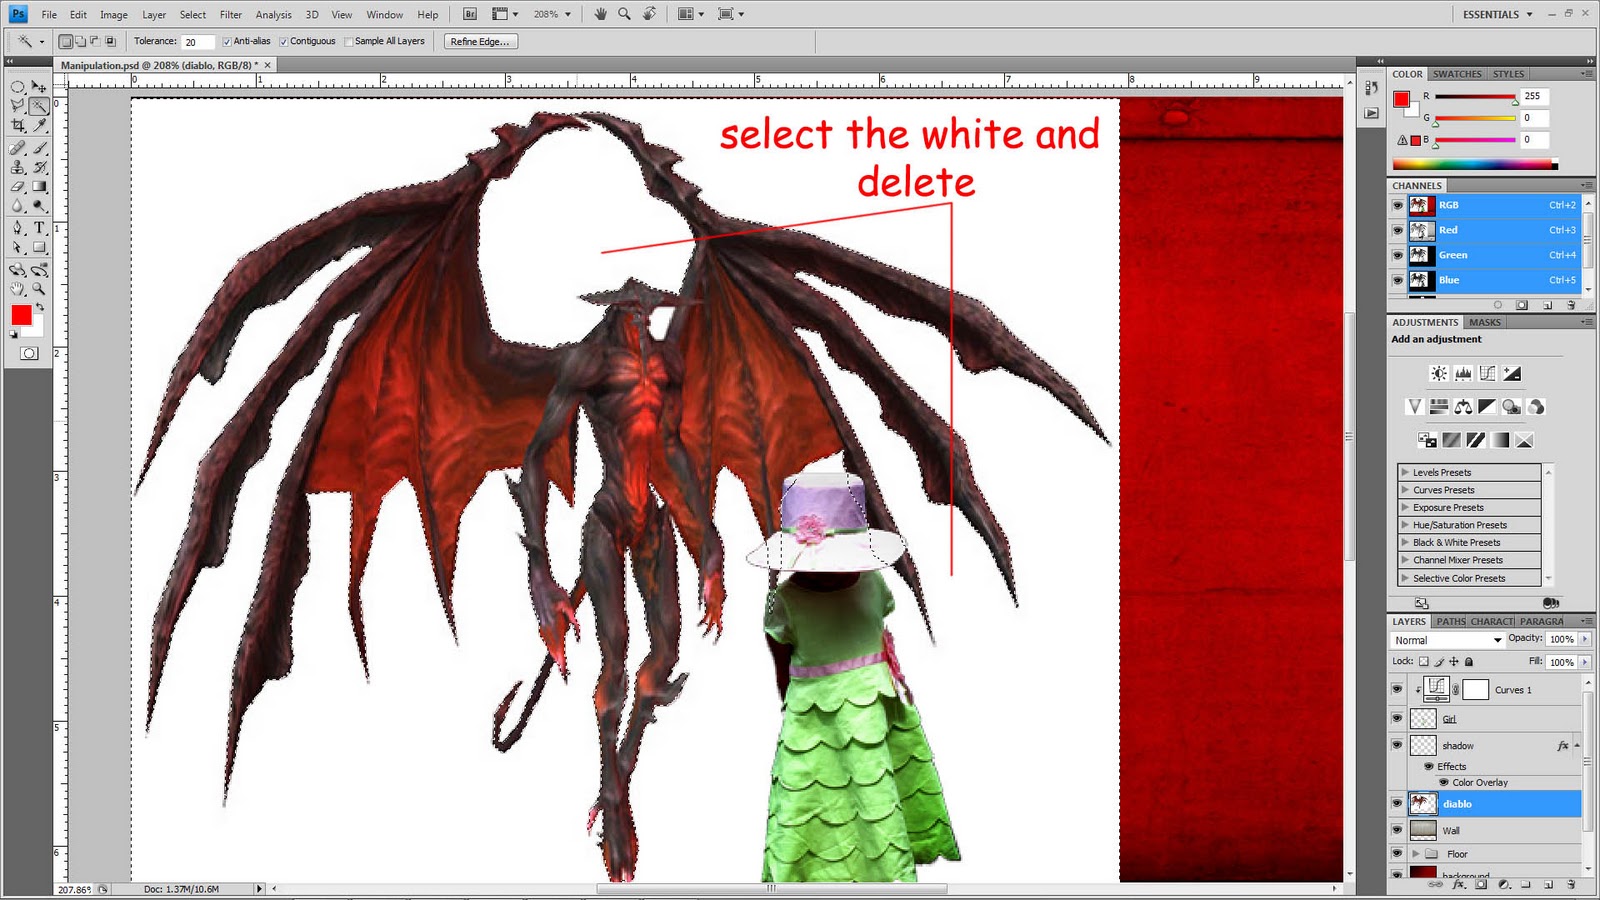
now Place the demon image in photoshop and place it in between the shadow and wall layers.flip the image horizontally and resize it to almost cover up the entire left side of the wall.

select the magic wand tool in the tools panel and select the white areas by clicking on them(you can add or remove selections by holding 'shift' or 'alt',respectively while using the magic wand tool).
 |
| select the white and delete the white from the demon image. |
now add a black colour overlay to the layer.

Add a guassian blur filter of 3.3pixels to both the diablo layer and the shadow layer to give the shadows a more realistic feel and finally i made the left side of the girl using the burn tool as well as parts of the floor in order to emphasize where the light source was.
FINISHED PIECE

Very long explanation,but my aim was to explain in detail just a little bit,i really hope some one gets some useful tips from this.
ReplyDelete